Search for answers or browse our knowledge base.
Completing and Monitoring the Portfolio
Portfolio structure
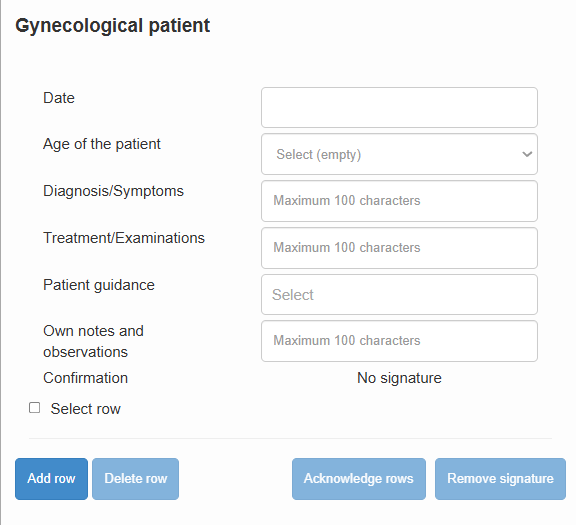
Entries are recorded in a table-based user interface. The table contains data fields related to each completed task or case, which may include multiple-choice selections, calendar entries, or free-text fields.
At the top of each page, there are instructions for making entries. These instructions are specific to that page and help guide users in completing it correctly.
The entries on each page are organized into rows, each containing predefined data fields for recording a task or case. The number and type of fields vary between pages, but they may include the following:
Multiple-choice field:
If information is selected from several options, clicking the field opens a drop-down menu. Examples of such information include the training placement or the type of supervision situation, which are selected from a limited set of alternatives.
Date:
Dates are selected from a calendar that opens when the field is clicked. The date may indicate, for example, when a case occurred.
Number:
Information can be entered in numeric format. Numbers are typed using the keyboard in the same way as text. Numeric data may include, for example, the patient’s age.
Free-text field:
Information can also be entered as text in free-form fields. The number of characters is limited, so it is recommended to use clear sentences and common abbreviations whenever appropriate.
Recording and Signing Off Entries
Detailed instructions for recording different types of entries can be found in each portfolio.
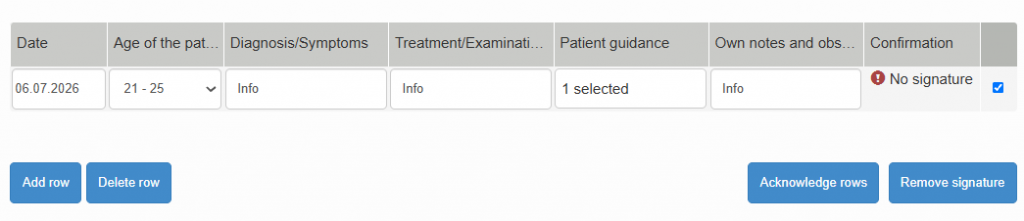
After you have completed the information for an entry, ask your clinical supervisor or teacher to sign it off as completed. The sign-off process is as follows:
- Select the row to be signed off from the right-hand side of the table.
- Click Sign Off Rows.
Note: Multiple rows can be signed off at the same time by selecting all the relevant rows.
- Select either Clinical Supervisor or Teacher as the signatory, depending on the situation.
- Enter the signatory’s name.
- Ask the signatory to review the privacy notice and provide consent for their name and signature to be stored.
- Ask the supervisor or teacher to provide their signature in the designated field.
- Click Save.
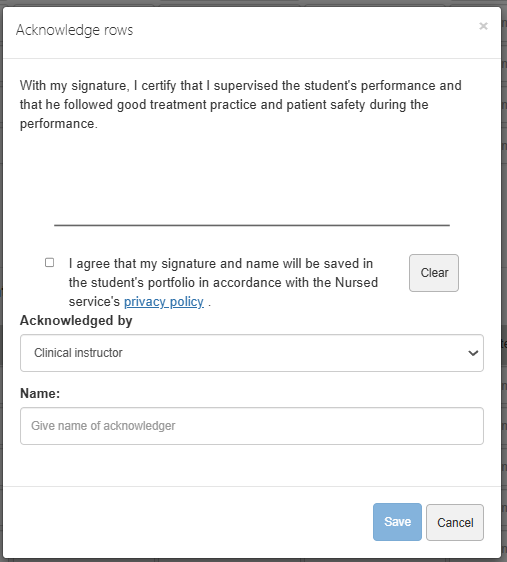
Once signed off, rows become locked and can no longer be edited. If necessary, the sign-off can be removed, after which the row becomes editable again and must be signed off once more.

Teacher Feedback
Teachers can view the performance records of all their students in the “Events” view.
The “Event Status” window provides a consolidated overview of all portfolios monitored by the teacher, as well as the status of all students within those portfolios. Using the tools at the top of the window, the teacher can filter the view, for example by date range or by student. By clicking specific items, the teacher can open a list of portfolios.
The “Recent Activities” window allows the teacher to quickly see the latest actions performed by students.
Individual portfolios can also be searched in the “Exercises” view. This view displays a visual list of portfolio exercise cards, which can be filtered based on criteria such as status.
By opening an individual portfolio, the teacher can view a report of the student’s progress. The report provides a centralized view of all entries made by the student and all sign-offs received. The teacher can leave feedback on individual rows by clicking the “Comment” button. In the same view, the teacher can also review messages and comments submitted by the student.